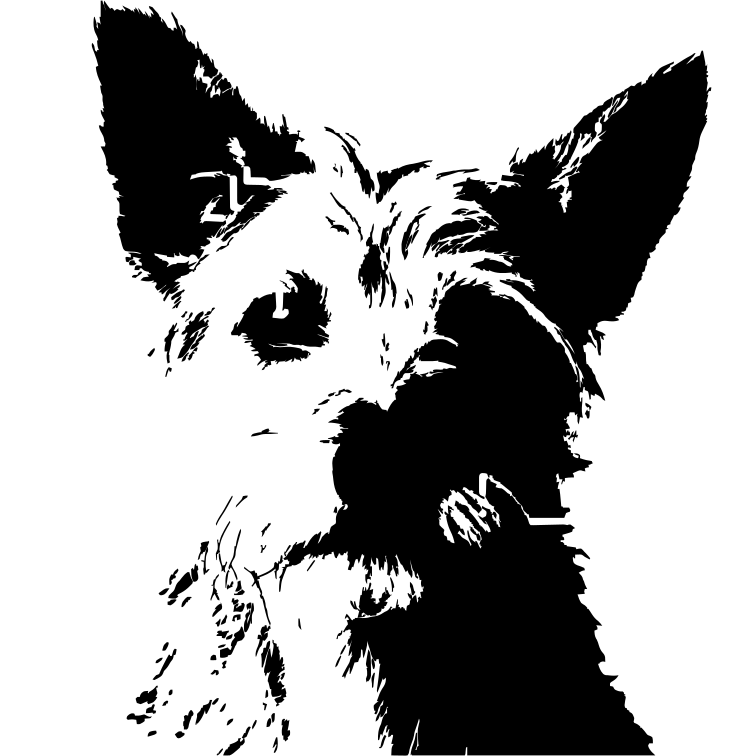
Spray paint and street art
Cut the stencil from Mylar or cardstock and spray light coats so paint does not creep under the edges.
Turn a photo or picture into a black-and-white stencil, keep letter centres and other islands attached with automatic bridges, and download it at the size you will cut.
Stencils are made one image at a time on every plan. Only the first selected image is used.
Checking your balance…
Not stored on our servers
From photo to cut file
PNG, JPG, WebP or GIF up to 10 MB. Crop close to the subject first; a plain background gives the cleanest edges.
Threshold splits the picture into dark and light at one level; Adaptive compares each area with its surroundings, which helps when one side of the photo is in shadow. Move the Detail slider until the eyes, letters or edges you need are clear. Nothing is used from your daily allowance while you adjust.
Enter the finished width. Islands that would fall out are joined to the sheet with bridges of the width you choose, and the preview counts how many were found.
Get an SVG for Cricut or Silhouette, a DXF in millimetres for laser and CNC, or a PDF that prints at actual size across A4 or Letter pages.
Pick a method
| Method | Works best for | Watch out for |
|---|---|---|
| Threshold | High-contrast photos, silhouettes, logos, portraits lit from the front | Shadows become solid black; a dark background can merge with the subject. |
| Adaptive | Uneven light, faces with a shadow on one side, textured subjects such as fur or stone | Busy backgrounds turn into speckles; raise Detail only as far as you need. |
Try both: switching methods and moving the slider is instant and free. Invert swaps black and white when you want the subject cut out instead of the background.
Keep every piece attached
An island is a piece of the stencil sheet completely surrounded by cut-out area: the middle of an O, A or R, the white of an eye, a ring inside a logo. Cut the stencil and it drops out, and the paint fills that space.
With Bridges on, the stencil maker finds every island and joins it to the rest of the sheet along the shortest route through the cut area, so each bridge is as short as possible. An island can connect through a neighbouring island. Islands smaller than a bridge can hold are filled in, and the preview tells you how many islands were found, how many bridges were added, how many small islands were filled and how many specks were cleaned.
| Material | How it is cut | Bridge width to start with |
|---|---|---|
| Printer paper or cardstock | Craft knife | 2–3 mm |
| Mylar or acetate (about 0.18 mm / 7 mil) | Craft knife or Cricut | 1.5–2 mm |
| Adhesive vinyl | Cricut or Silhouette | 1–1.5 mm, or turn bridges off and place the islands by hand |
| Thin plywood or MDF (3 mm) | Laser | 2–3 mm |
| Cardboard | Craft knife | 3–4 mm |
When not to use bridges: screen-printing emulsion and adhesive vinyl hold islands in place by themselves, so bridges only add lines to the print. Turn them off there.
Real size
Enter the finished width in millimetres or inches before you download. The SVG is written with that width and height, and the DXF opens at that size in millimetres, so LightBurn, Fusion 360 or Inkscape show the dimensions you asked for.
The PDF is made for printing a stencil bigger than one sheet. It tiles the design across A4 or Letter pages with a 10 mm overlap and alignment marks, labels each page by row and column, and draws a 50 mm (2 in) check square on the first page. Print at 100% / Actual size, measure the square, then tape the pages together using the marks.
In Cricut Design Space, upload the SVG and check the size shown on the canvas before you cut; set it again if it differs.
Measured, not mocked up
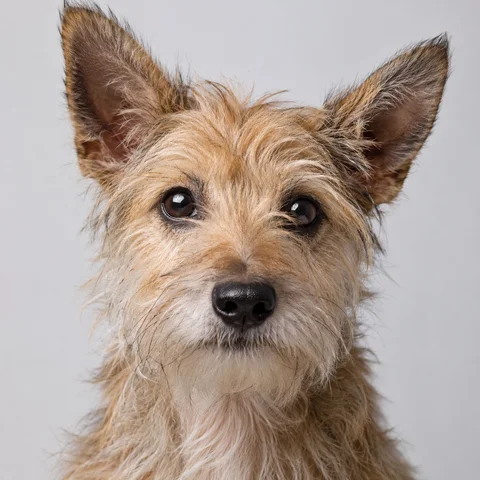
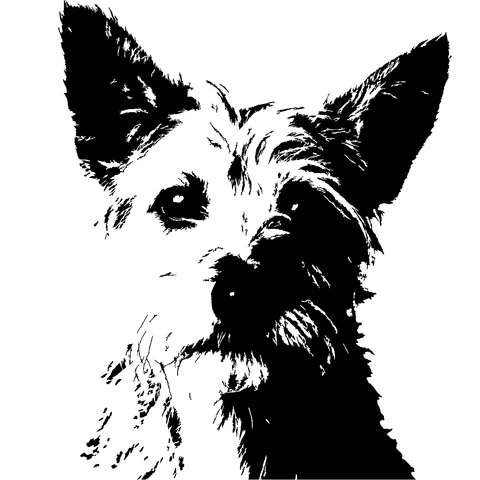
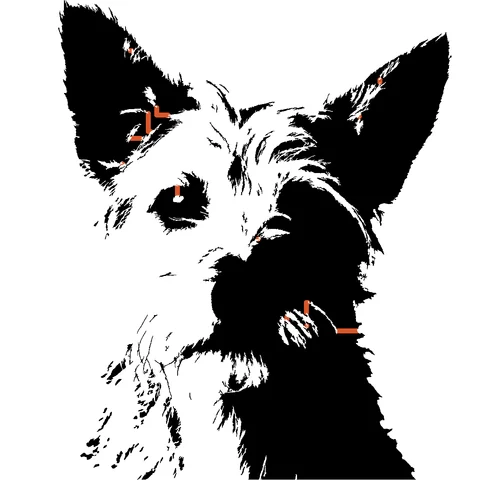
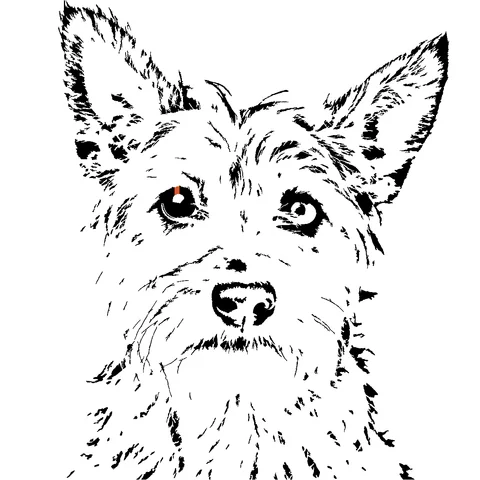
All three came from this photo at 200 mm wide. Without bridges, 95 islands would fall out when cut. With 2 mm bridges, 13 bridges hold the islands big enough to need one, and 82 islands too small to hold were filled in. Every mode also cleans up tiny specks (8,073 in this photo).
| Setting | Islands found | Bridges added | Small islands filled | Specks cleaned | Closed outlines | Nodes | Size | DXF size | PDF pages (A4) |
|---|---|---|---|---|---|---|---|---|---|
| Threshold, bridges off | 95 | 0 | 0 | 8,073 | 252 | 10,406 | 200 × 200 mm | 516,632 bytes | 2 |
| Threshold, 2 mm bridges | 95 | 13 | 82 | 8,073 | 157 | 8,823 | 200 × 200 mm | 433,329 bytes | 2 |
| Adaptive, 2 mm bridges | 9 | 1 | 8 | 9,308 | 483 | 41,722 | 200 × 200 mm | 2,032,904 bytes | 2 |
| Threshold, 2 mm bridges, 400 px source | 52 | 15 | 36 | 961 | 115 | 10,929 | 200 × 200 mm | 497,030 bytes | 2 |
The same photo reduced to 400 px wide still converts, but its edges follow the pixel steps, and at 200 mm each pixel is half a millimetre. Upload the largest original you have.
Download sample SVG · DXF · PDF
Measured by running this site's stencil maker on the sample photo; your own image will give different counts.
Uses
Cut the stencil from Mylar or cardstock and spray light coats so paint does not creep under the edges.
Use adhesive vinyl or a printed paper template; bridges keep the centres of letters on the board.
Freezer paper or vinyl stencils with fabric paint; the PDF prints the design at the size of the garment.
The DXF has closed outlines in millimetres; cut the stencil from thin plywood, or use it as an engraving mask.
Cut food-safe Mylar on a Cricut, then dust cocoa or icing sugar through it.
Print a large stencil across several pages, tape it together and trace or paint through it.
Choose a good source
The stencil follows the edges of dark and light areas. It does not draw single centre lines.
Make 10 stencils a day without an account; SVG, DXF and PDF downloads are free on every plan, and adjusting the preview never uses your allowance. Image Pack adds 250 images in one purchase, and they never expire. Pro includes 1,000 images per month or 12,000 per year, depending on your plan. Compare the plans and prices.
Need a colour SVG instead? Try the image to SVG converter.
For DXF details such as layers and file version, see the JPG to DXF converter.
FAQ
Yes. You can make 10 stencils a day with no sign-up, and the SVG, DXF and PDF downloads are included. Adjusting the method, detail, bridges and size happens in your browser and does not count.
Upload the photo, pick Threshold or Adaptive, move the Detail slider until the shapes you need are clear, keep Bridges on, enter the finished width and select Make stencil.
Thin strips of the stencil sheet that hold islands, such as the middle of an O, to the rest of the sheet so they do not fall out when you cut.
Yes. Switch Bridges off for adhesive vinyl or screen printing, where islands stay in place by themselves. The preview still counts the islands so you know what will drop out.
Any size: enter the finished width, then download the PDF. Larger designs are split across A4 or Letter pages with overlap and alignment marks. Print at 100% and check the square on page 1.
Yes. Upload the SVG, check the size on the canvas and cut. The stencil is one colour, so it comes in as a single layer.
Yes. The DXF has closed outlines in millimetres at the size you entered, readable by LightBurn, Fusion 360, AutoCAD and Inkscape.
It makes filled shapes for cutting and painting. Tattoo transfers need single-line outlines, which this tool does not draw.
Adjusting the stencil happens in your browser. When you make the stencil, only the black-and-white version is uploaded, converted in server memory and not kept there; no third-party AI receives it. History is saved only in your browser and can be turned off.